

Microsoft’s robust Office 365 suite features a comprehensive range of tools designed to make enterprise users more productive. Some of the many handy features you can look forward to include web scheduler, SharePoint, co-authoring and custom styles for documents, just to name a few.
However, with new features being added all the time, there might be some Office 365 features you aren’t using, or don’t even know about. To help you get the most out of your Office 365 subscription, we’re sharing 4 cool features that most Office 365 users don’t know along with tips on how to put them to good use.
Use PowerPoint’s Zoom Feature to Transform Your Presentations
When giving a presentation, you might want to refer back to a specific slide at a certain point in time. Previously, you could only move a slide backwards or forward which didn’t allow presenters to achieve a more flexible flow. Fortunately, The July Insider product update to Office 365, released on 26th July, 2016, added a new PowerPoint feature that enables users to easily make interactive, non-liner presentations.
It’s called Zoom.
With this feature, you can jump from and to specific sections, portions and slides of your presentation in a pre-determined order as you’re presenting. Microsoft uploaded a video demonstrating the functionality of PowerPoint Zoom, shown below.
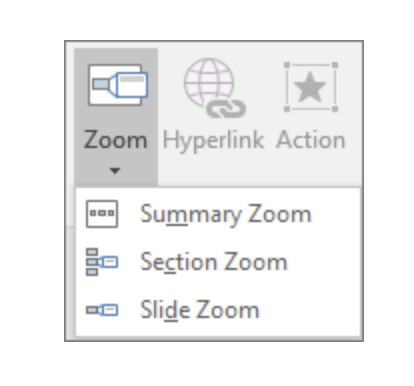
To use Zoom, go to “Insert” > “Zoom” in PowerPoint.
Choose “Summary Zoom” to display the whole presentation on a single landing page.
Choose “Slide Zoom” to display selected slides.
Choose “Section Zoom” to display a selected section.
If you select “Slide Zoom” for instance, PowerPoint will add a link to the existing slide to any slide in the presentation. By default, PowerPoint selects no slides, instead, it gives you the option to choose any slide from your presentation in any order you want.

PowerPoint will then add linked thumbnails of the selected slides to the first slide. Initially, the thumbnails will be stacked as a group. By clicking anywhere else on the slide, you’d be able to ungroup them and then drag to place them individually. From this point onwards, all you have to do is click on the linked thumbnail to move to that particular slide.
To put it briefly, Zoom for PowerPoint can truly light up your presentations when you make it your own.
Improve Collaboration & Sharing with Groups for Outlook
Setting up distribution lists usually means sending contact names to your IT team. If someone isn’t included, they’re at risk of missing out on important email messages. Groups for Outlook eliminates the risk by allowing users to create groups for emailing.
Essentially, the feature lets you create a shared workspace for collaboration. In addition, you can also share files, calendars, inboxes, and even OneNote files. Here’s how to set it up:
- Launch Outlook 2016
- Select “New Group” on the Home tab

- In “Create Group” window, fill in the required details i.e. name, email ID, description, classification, and privacy level, (Public or Private).
Note: group email addresses can’t be changed once the group has been created.

- Choose “Advanced Options” and check the group conversations box to allow members to receive emails in their personal inbox or leave it un-checked if you want them to access the group’s mail just from the group’s inbox, and then select “Create” to proceed.
- Add members, description, and a display image for the group, and then click “OK.” You can add members after creating the group as well.

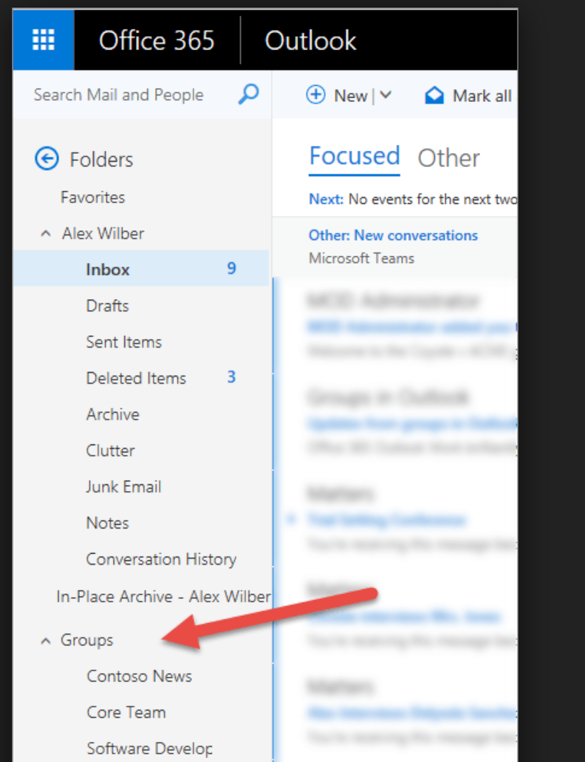
- Click “Add” and your newly created group will appear in the left navigation. You’ll also receive a Welcome email in the inbox for your group.
Your IT team can activate or deactivate the ability to create groups for your enterprise. If, after following these steps, you aren’t able to make a group, contact your IT team.
Find What You’re Looking for with Office 365’s Tell Me Function
One of the best yet vastly unexplored Office 365 features is the Tell Me function. If you’re searching for a certain tool within Word or Excel or PowerPoint, you don’t want to be redirected to the Microsoft Support website to learn about it, do you? Tell Me solves this dilemma by providing you with a link that launches the tool that you’re searching for.
Here’s how it works (we’ve selected Word for the purpose of demonstration):
- Open the Office 365 app from your taskbar, desktop or Start menu and open Word.
- Click “Blank Document” > “Tell me what to do” field. It’s situated alongside the top of the window. There’s a lightbulb beside it.

- Type your “problem or question” and choose the “corresponding action” from the dropdown menu.
That’s it.
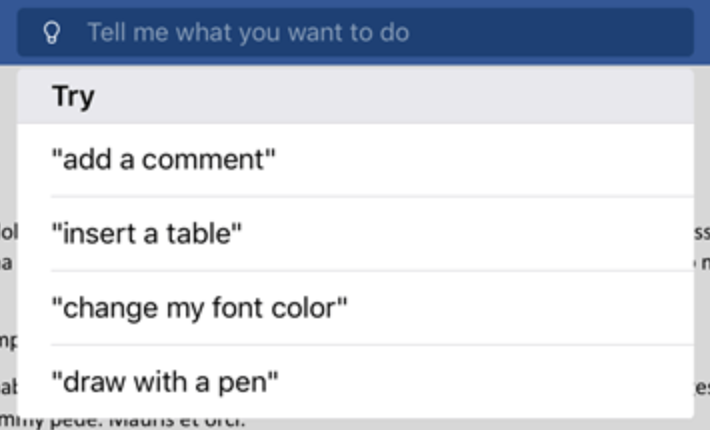
Type in some words and you’ll see the list of tools start to populate, allowing you to choose what you’re looking for as you continue working.
Save Time with Excel’s Flash Fill Feature
Re-entering data that’s already present in a spreadsheet can often be a frustrating exercise. Fortunately, Excel in Office 365 has a Flash Fill feature that can aid users by automatically filling in fields. It even gives you the ability to take a section of the data entered in a column of an excel table, type part of it over into another column, and fill a series.
All you have to do is enter enough data for Excel to recognize a pattern, and the rest will be taken care of.
Here’s how to apply Flash Fill on an Excel spreadsheet that already includes data:
- Open Excel from your taskbar, desktop, or Start menu.
- Select “Open Other Workbooks” and click the “file” you want to open.
- Enter a value in a cell and press the “Enter” key.
- Press “Ctrl + E” on your keyboard to fill in the rest of the column values automatically.


If Flash Fill doesn’t work after these steps, keep entering values until Excel is able to recognize a pattern.
Final Verdict
With Office 365, Microsoft continues to do a great job at helping enterprises foster sharing and collaboration among their staff. By getting to grips with these new features, you and your team can get your work done more efficiently and increase your productivity.
You must be logged in to post a comment.