

Everywhere you look there’s yet another small to medium business (SMB) adopting Office 365. Microsoft provides every incentive to ease your company into its cloud-based office suite. Instructional videos, phone support, installation guide – your transition to Office 365 will be met with hand-holding all along the way.
But the environment you get isn’t necessarily foolproof. The large part of the cost and time of administration is tied up in common security measures: managing group admission, pruning users, creating security policies and ensuring users have access to network resources. Office 365 moves these tasks to the cloud, but doesn’t necessarily make them easier for users.
What this implies is not that Office 365 is the Fort Knox of cloud-hosted software: it merely shows that it’s secure enough for all kinds of businesses to integrate it into their infrastructure. It has scope for the user to layer more security mechanisms on top to make the end product even for attractive security-wise.
So what can you do to make Office 365 more secure? Here are some recommended measures:
1. Use Multi-Factor Authentication
Because of the growing sophistication of modern cyber threats, Office 365 users shouldn’t rely on a single password to safeguard their accounts. To reduce infiltration instances, we recommend enabling multi-factor authentication (MFA) for your Office 365 deployment.
To set up MFA, follow these steps:
1. Sign into your Office 365 account as you usually do and navigate to the Office 365 admin center.
2. Choose users and groups.
3. Click Set Up. You’ll find it next to Set Multi-Factor Authentication Requirements.
Note: If you want to use MFA only for Office 365, do not create a MFA provider in the Azure Management Portal and connect it to a directory. Doing so will redirect you from Office 365 MFA to a paid MFA version.
4. Identify the user that you want to activate MFA for. You may need to modify the view at the top. Ensure that the status of the user is disabled and mark a check in the box next to their name.
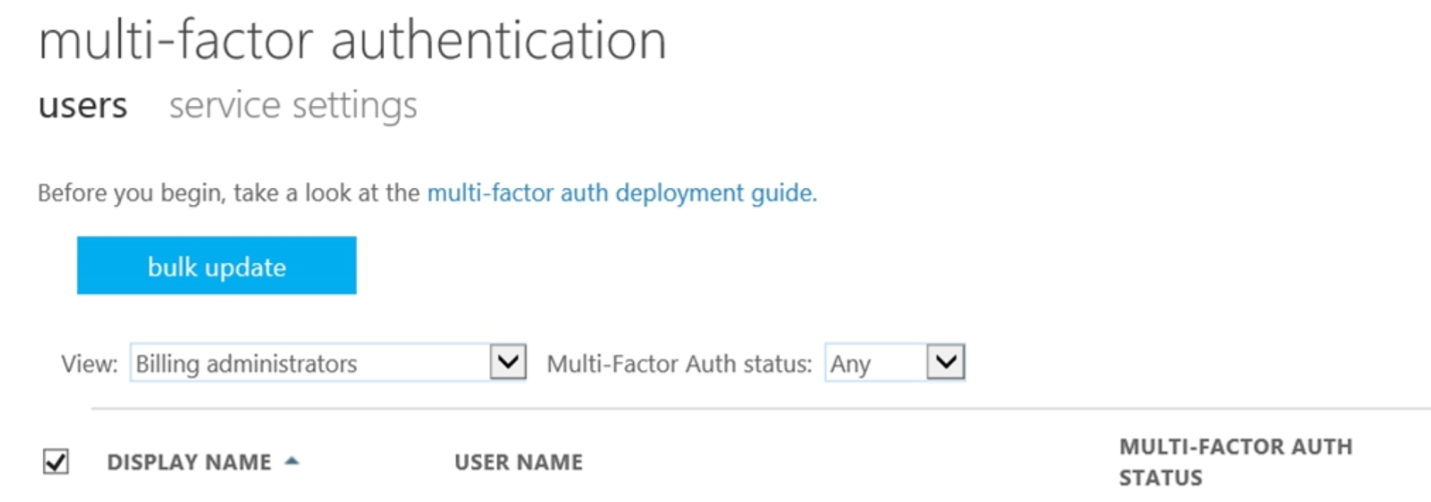
5. Now you’ll get two options on the right: Enable & Manage User Settings. Click Enable. This will display a pop-up that will mention the next steps you need to take. Click enable Multi-Factor Auth.
6. Once you have the account enabled for MFA, your Office 365 users can sign-in and finish registration.
2. Backup Office 365 Data
Data loss is often a big concern for Office 365 users because Microsoft’s backup policies don’t guarantee a full and quick restore of lost data. Even when data can be retrieved, the process is complicated, and retention policies vary for all applications included in the platform. A better option is to use a third-party tool like Barracuda Backup or AvePoint Cloud Backup for securing Office 365 data.
Barracuda Backup now features Cloud-to-Cloud Backup for Office 365. This functionality protects OneDrive for Business, SharePoint Online, and Exchange Online data by creating a backup for it in the Barracuda Cloud Storage. This backup software can be used as a standalone subscription or as an add-on to on-premises Barracuda Backup devices.
Another option is AvePoint Cloud Backup. It gives you the freedom to decide where your data is stored, how much you want to recover, and when. AvePoint runs around the clock backup and on-demand recovery to ensure your projects, tasks and files are fully protected and kept on track. In addition, the tool enables you to granularly restore the backup to another person’s mailbox or export a PST on demand.
3. Enable Advanced Threat Protection
One of the most dangerous threats to Office 365 users, especially those who frequently use Outlook, is ransomware. It’s spread mostly through attachments and malicious links inside emails. Messages are getting more and more realistic looking and sophisticated, making them harder to identify – especially for Office 365 users who aren’t trained in identifying malicious emails.
Fortunately, Advanced Threat Protection is now available. It’s an add-on that helps by blocking attachments and malicious links before they get into your inbox.

It does that by opening links and attachments in a virtual environment (entirely separate from your Outlook account) and scanning for malicious activity before the email arrives in your inbox.
It’s also a good idea to do periodic staff email drills with Phishing Tests and recognition incentives. This will help end-users become more hardened to sneaks and reduce the risk exposure of the most vulnerable layer – the human layer.
4. Verify & List All Your Domains as Authoritative Domains in Exchange admin center
When you first install Office 365, you’ll be promoted to configure the DNS of your domains to be compatible with the software. Microsoft offers records for autodiscover (CNAME), Sender Protection Framework (SPF), and mail routing (MX). It’s important to apply correct settings here to avoid lack of client connectivity or loss of mail flow.
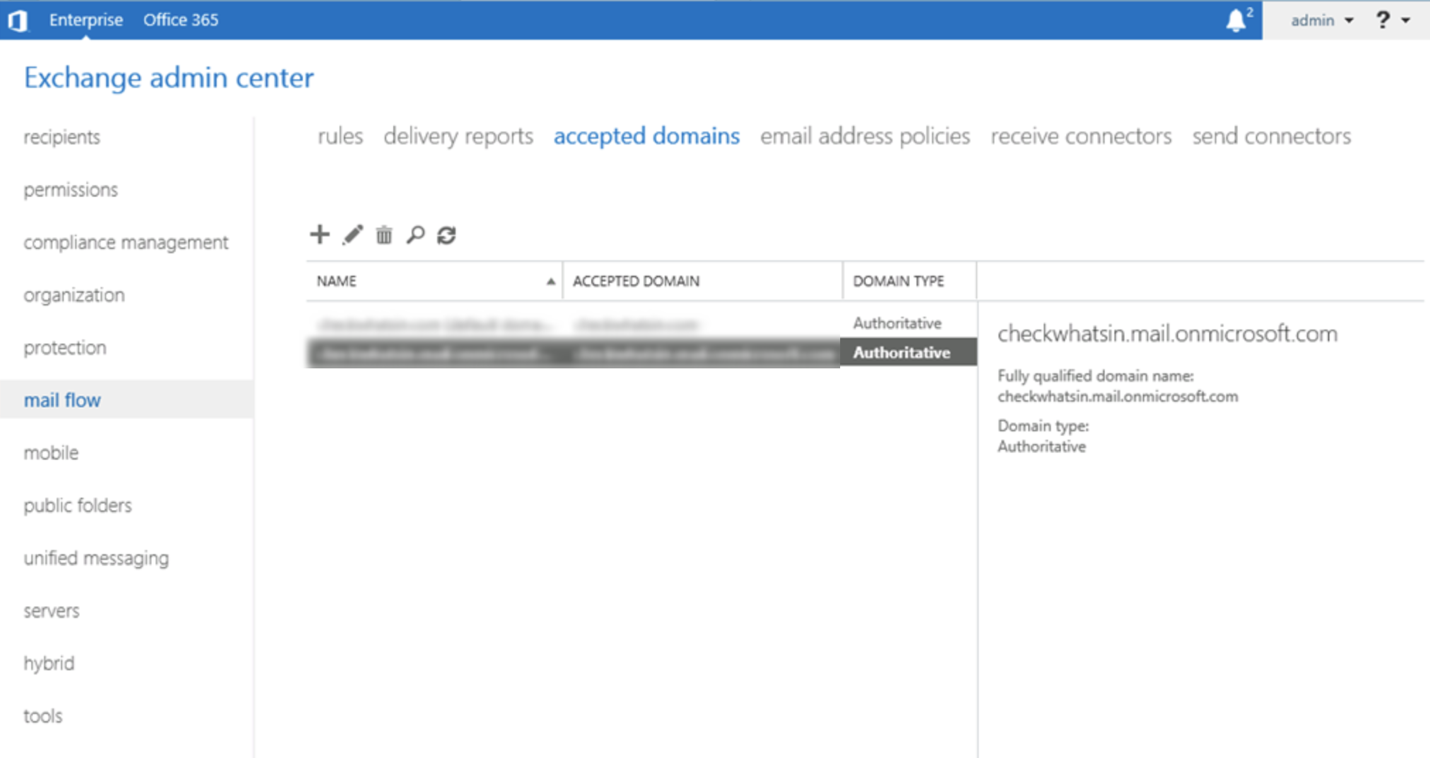
So, once you’re in the Exchange admin center, you should verify that all of your domains are listed and declared as authoritative, or of the appropriate relay type as required under Mail Flow > Accepted domains, as displayed in the screenshot below.
SPF is a special consideration. This record is used to inform external mailing systems whether the email from your domain is associated with an authorized system. The record offered by Microsoft will be suitable if your email originates from Office 365 only.
5. Be Smart with External Sharing
On paper, external sharing in Office 365 refers to making content available to someone outside your company. In reality, it can imply different things based on whether or not the content is shared with an authenticated outside user or anonymously. The risk is that if full control is granted to an external user, he or she could share content with other external users.
Because of the associated risks, most Office 365 users prefer deactivating external sharing altogether. This can result in a multitude of other issues, such as personnel using third-party tools like Google Drive to send and receive documents. Hence, administrators could lose control over what is externally shared.
A better approach is to configure Office 365 external sharing settings to the needs of your company, rather than simply disabling it. Here’s how to do it in SharePoint:
- Enable External Sharing for SharePoint for Office 365 tenant as a whole. This can be found in Settings > Security & Privacy within your Tenant Admin Console.
- Navigate to Admin from Office 365 home screen.
- From Admin, select “Admin centers” tab on the left side and then “SharePoint” to go to the admin settings page. From here, you’d be able to configure external settings.

- Native to “Sharing” on the left to see all of the sharing options. You can allow or disallow sharing outside your organization, grant or revoke permission to invite and share with authenticated external users, and more.
It’s crucial to note that external sharing is allowed by default, anonymously or not, in your enterprise. You can beef up Office 365 security by adjusting this setting to your specific business needs to prevent accidental data leaks.
6. Pay Attention to Client Security
Don’t neglect security on client systems that will log into your cloud environment. Make sure security patches are up to date on their machines. You can also use Active Directory Federation Services to set client policy rules that prevent users from logging in if they are on a certain range of IP addresses.
A software we recommend for the purpose is Office Client Deployment. It keeps client versions of Office updated via latest security patches. Users do get flexibility when it comes to updates, for instance they can opt in to bug fixes on a quarterly basis. Office deployments can be controlled using an XML-based deployment process known as Click2Run, which is only available on Office 365 Pro Plus plans.
7. Set Up Alert Policies in Office 365 Compliance Center
Creating alert policies in Office 365’s Compliance Center can assist you in meeting your organization’s data security obligations. For example, alerts can warn personnel about sharing confidential information anytime they’re about to email contacts who aren’t listed as authenticated in the organization’s network. These preemptive notices can educate employees on data sharing best practices and prevent data leaks.
To view and set up alert policies, head over to Alerts > Alert policies in the Security & Compliance Center.
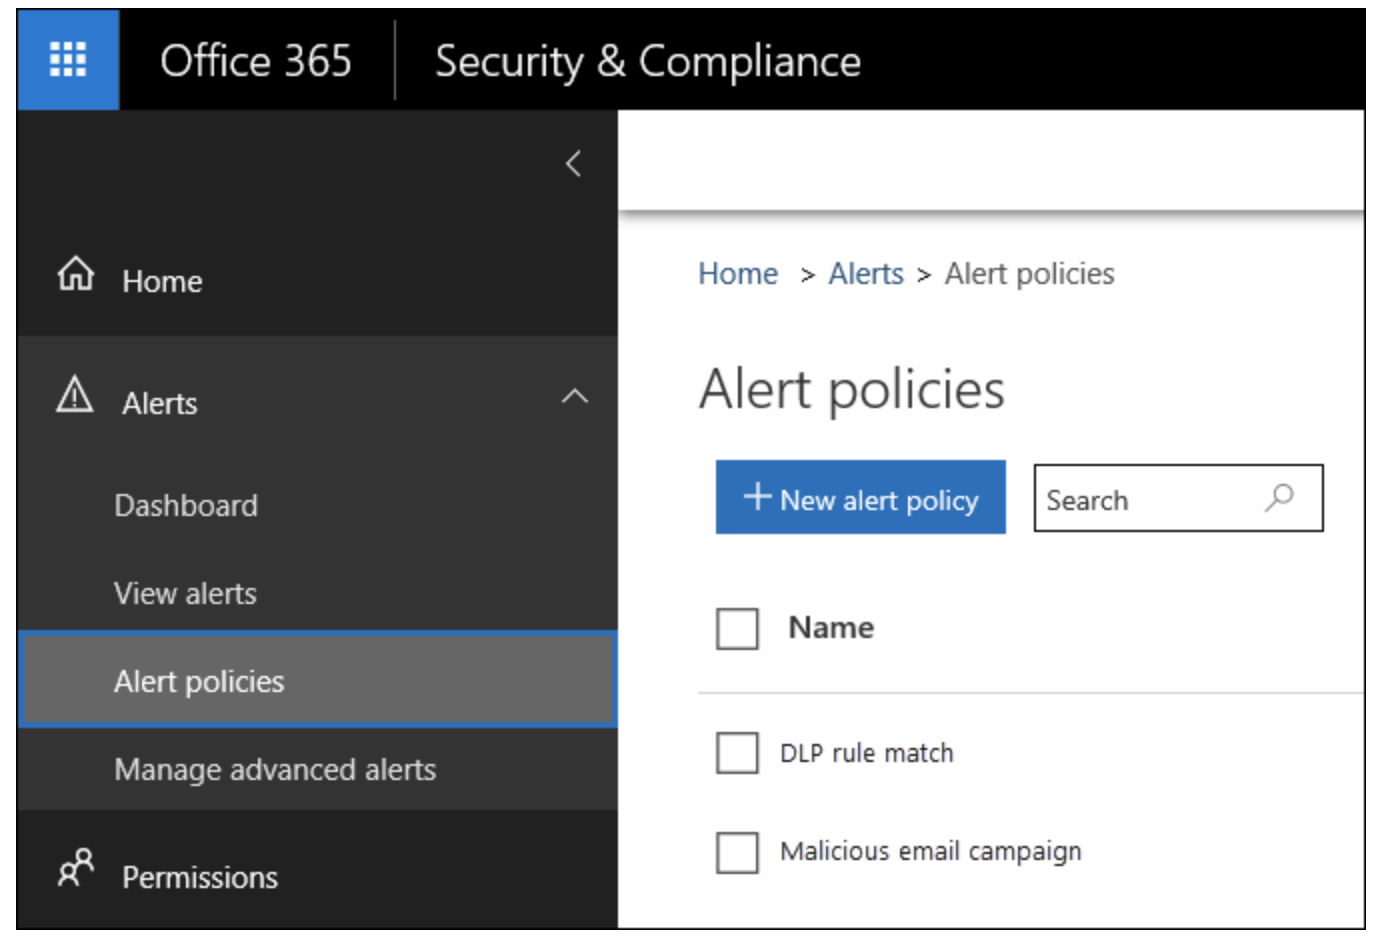
Office 365 offers several built-in alert policies that help determine permissions abuse, data governance risks, and malware risks. They’re activated by default, but can be deactivated and turned back on later. Users can also set up a list of contacts for delivering email notifications to, and set a daily alert limit. Other settings for these policies can’t be edited.
8. Track Admin Activities
Office 365 Manager Plus includes a special set of reports that let users track admin activities. By using Exchange Admin Activity Report, Litigation Hold Activity Report, Mailbox Permission Changes Report, Azure Admin Activity report, and other reports uses can keep tabs on admin activities to discover any potential sources of undesirable happenings.
Combine this with the alert policy tips to flush out adverse activities from your Office 365 setup.
Final Verdict
While Office 365 offers you the ability to collaborate flexibly, you must be aware of the potential security risks at all times. Use the tips mentioned above to prevent unauthorized users from accessing your Office 365 apps and safeguard confidential data. In addition, you can seek assistance in securing your data from the Office 365 support team.
You must be logged in to post a comment.